


How to Read a Blood Pressure Monitor
How to Read a Blood Pressure Monitor: A Simple Step-by-Step Guide
Monitoring your blood pressure at home is a great way to stay on top of your health, but if you’re new to using a blood pressure monitor, it can feel a little confusing. Don’t worry—we’ve got you covered! In this guide, we’ll walk you through how to read and understand your blood pressure monitor, highlight common mistakes to avoid, and answer questions you might not even know you have. Let’s dive in!
Step 1: Prepare Properly for an Accurate Reading
Before you even turn on your monitor, follow these steps to ensure accurate results:
- Rest for 5–10 minutes: Sit quietly in a chair with your back supported and feet flat on the floor. Avoid talking, moving, or checking your blood pressure right after eating, exercising, or feeling stressed.
- Position your arm correctly: Place your arm on a table or desk so the cuff is at heart level. Roll up your sleeve—don’t measure over thick clothing.
- Use the right cuff size: Most monitors come with adjustable cuffs. If the cuff is too tight or loose, readings may be inaccurate. Wrap it snugly around your bare upper arm, about 1 inch above your elbow.
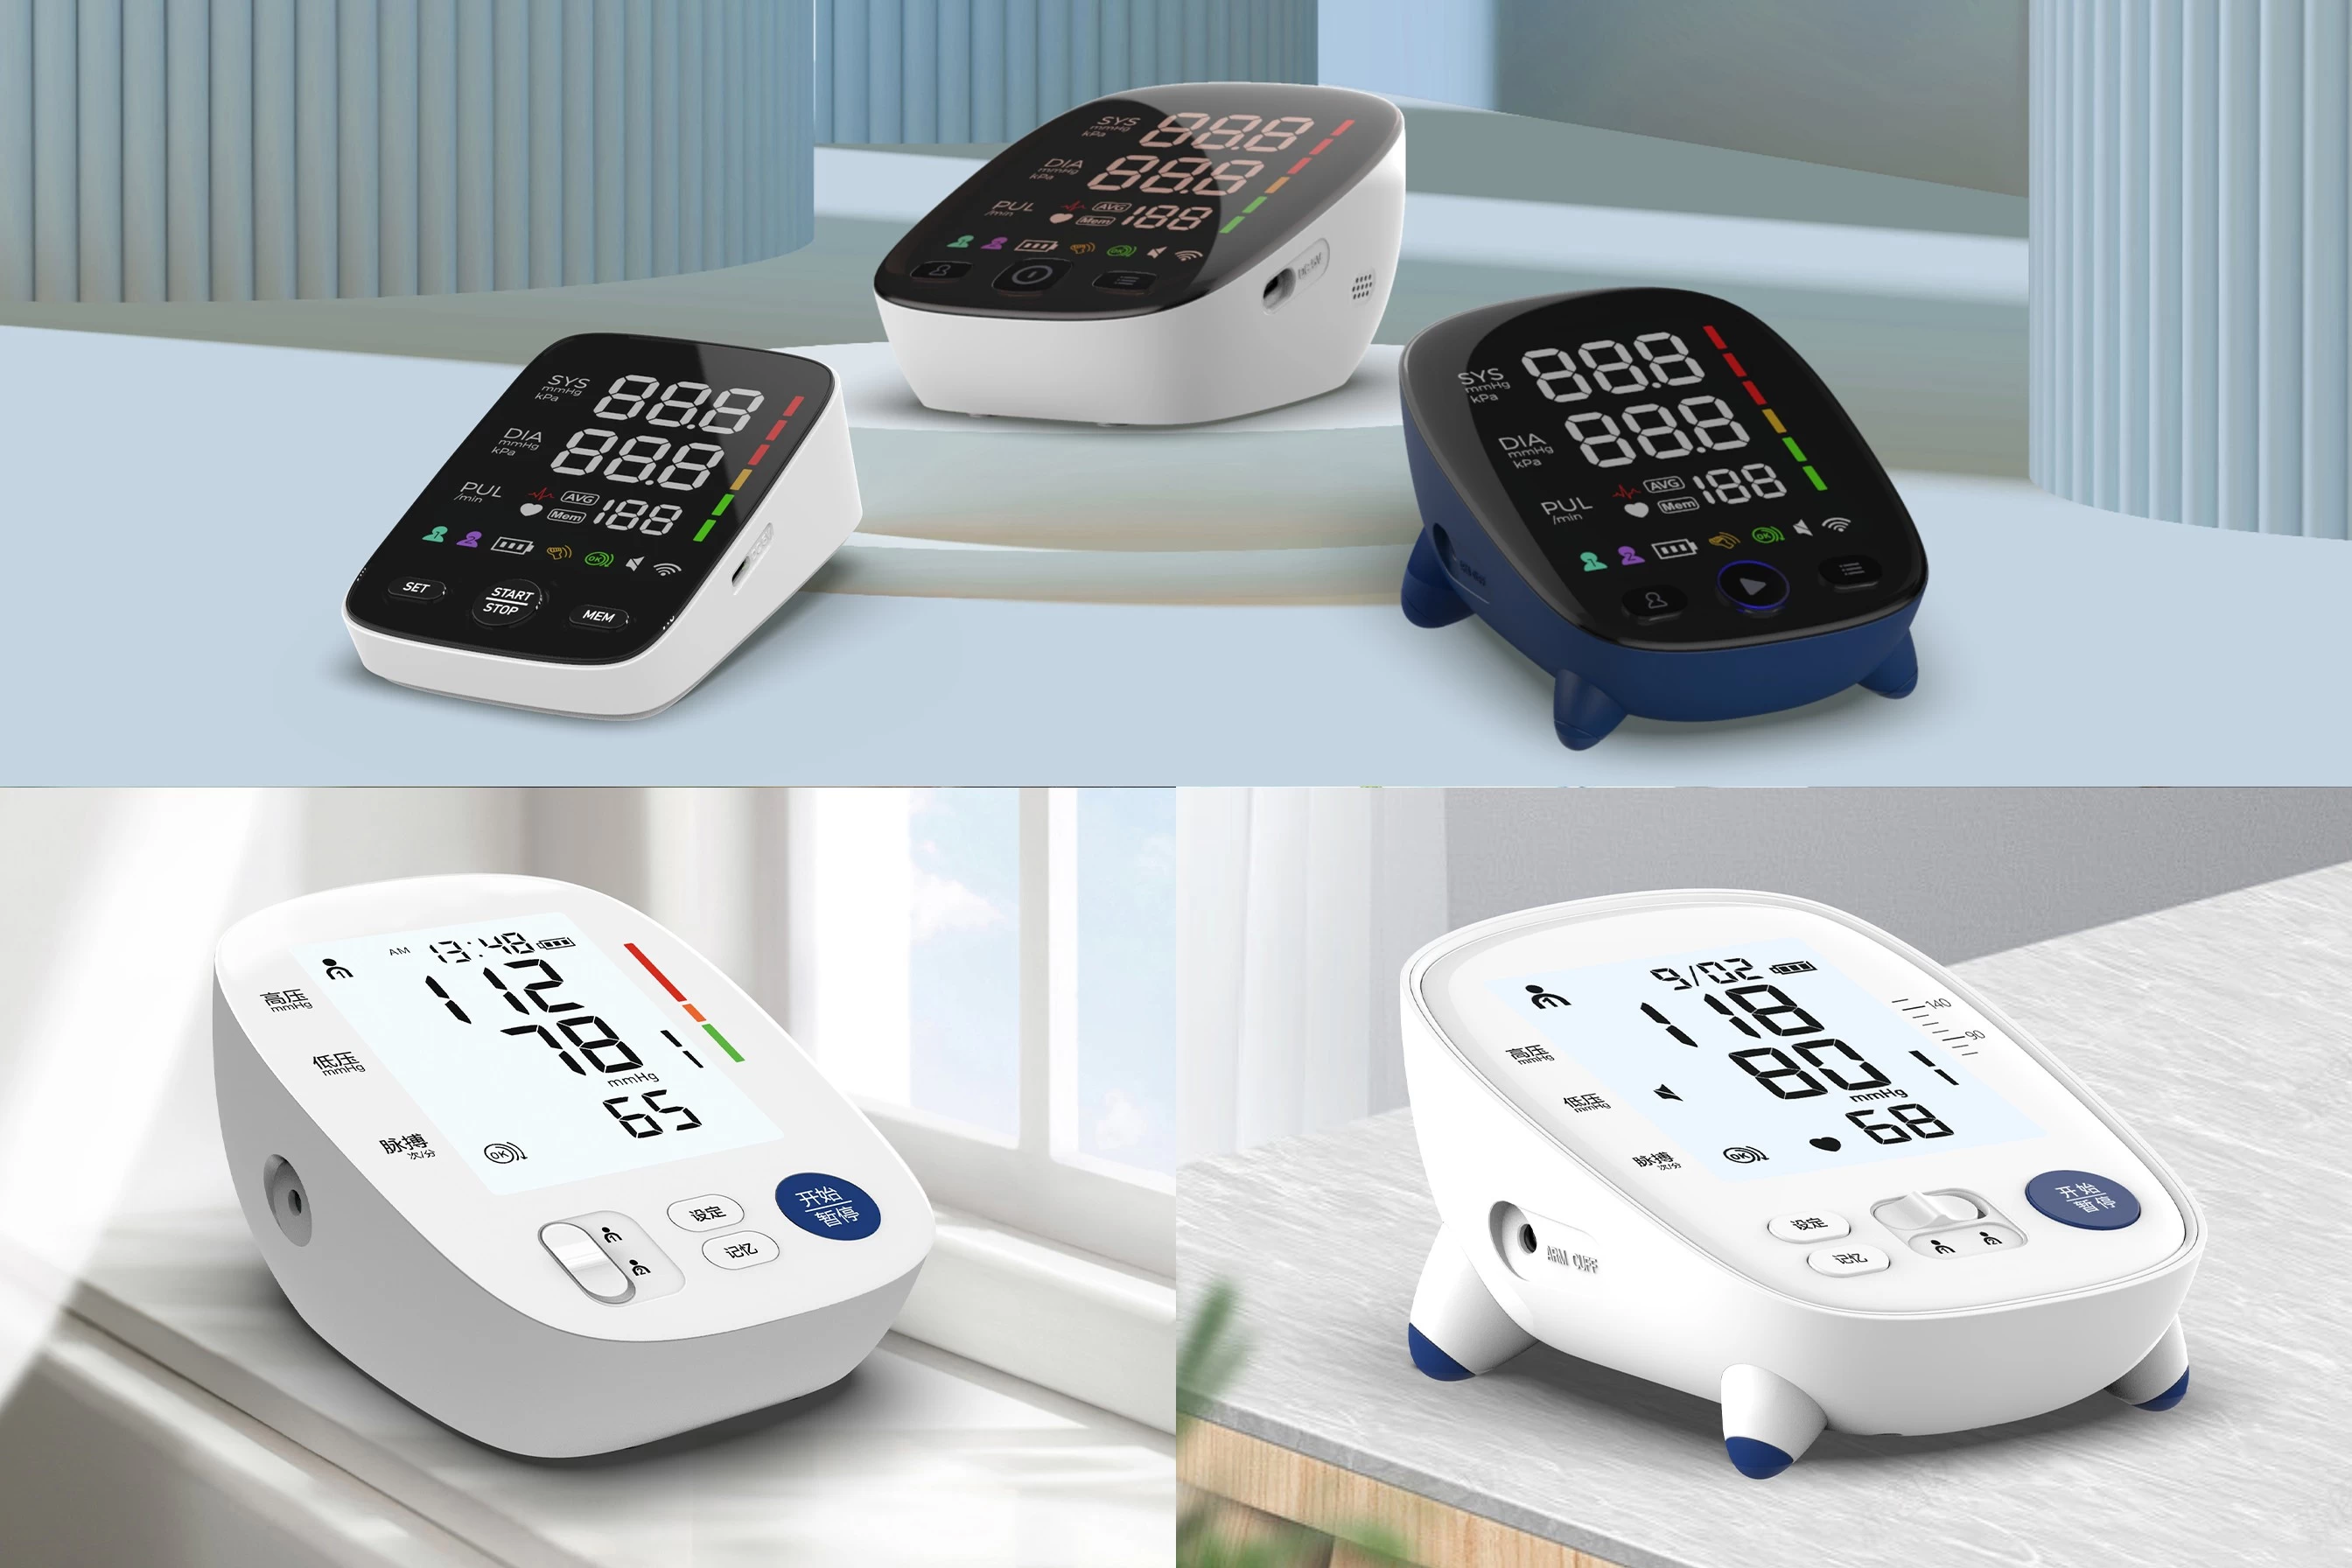
Step 2: Take the Measurement
Once you’re ready, follow these steps:
- Turn on the monitor and position the cuff as instructed. For most devices, the tube should run down the center of your arm.
- Press the start button. The cuff will inflate automatically. It might feel tight—this is normal!
- Stay still and silent until the monitor finishes. Moving, talking, or crossing your legs can skew results.
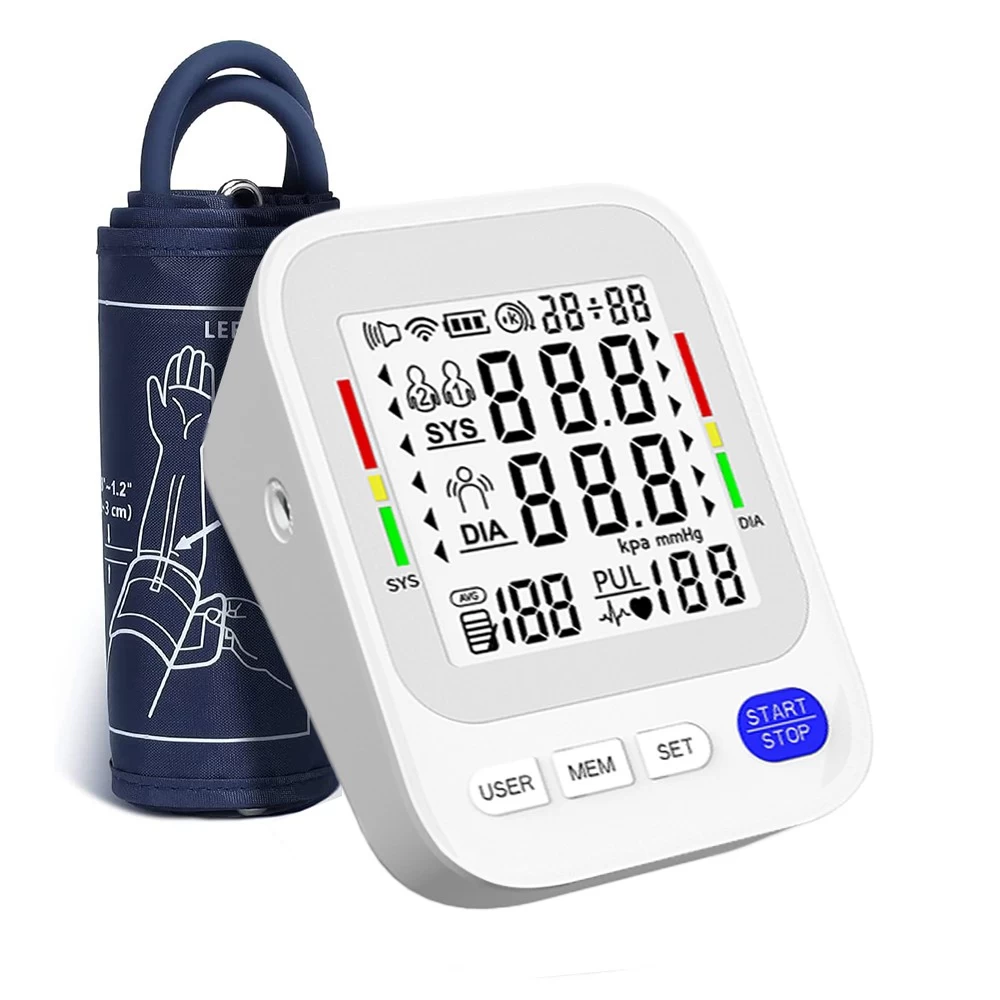
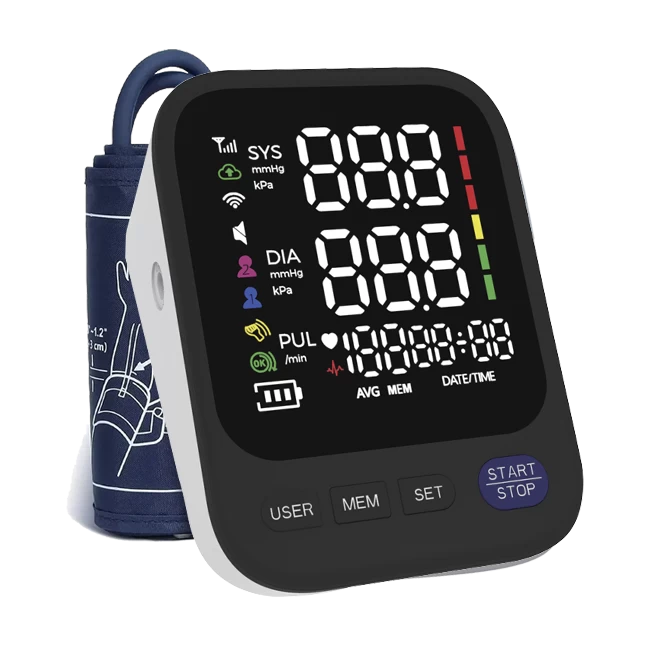
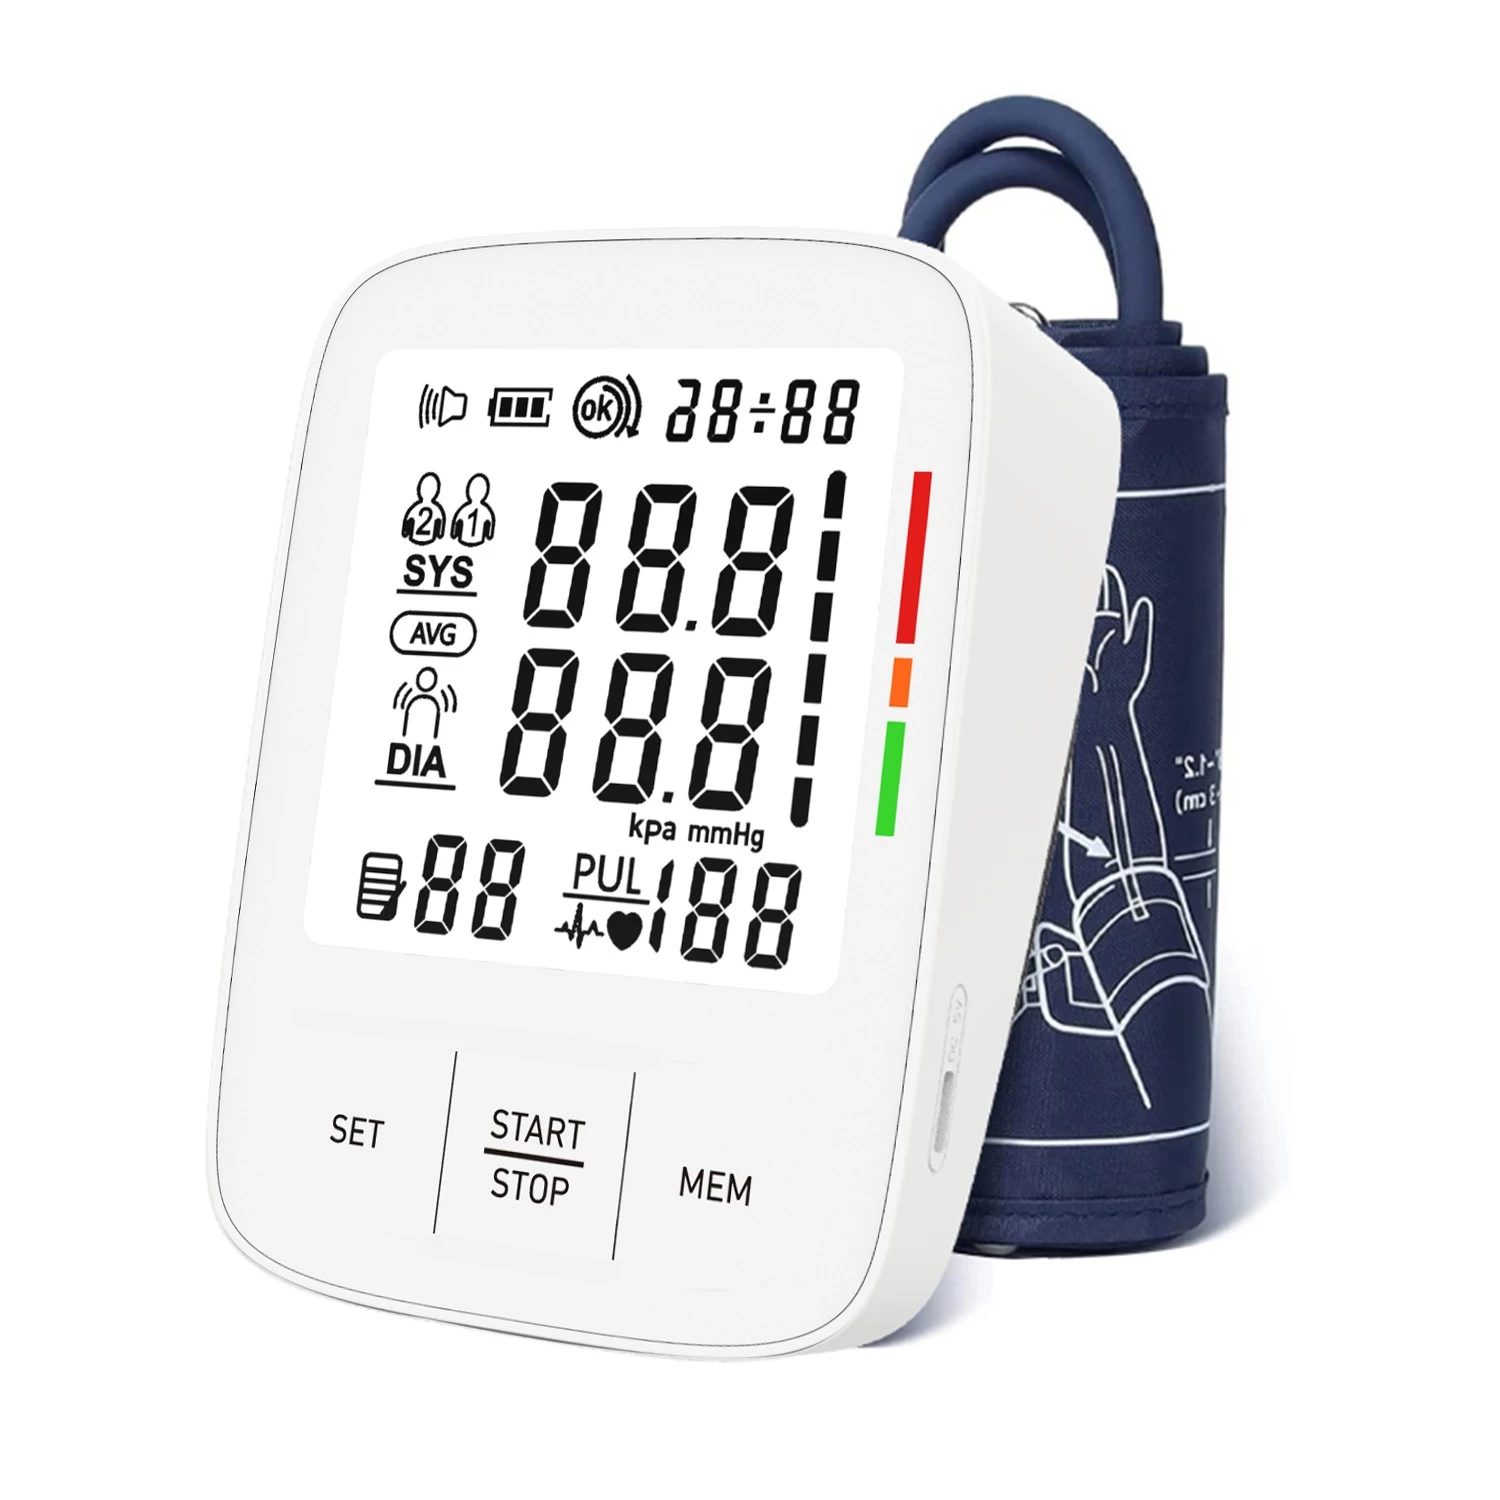
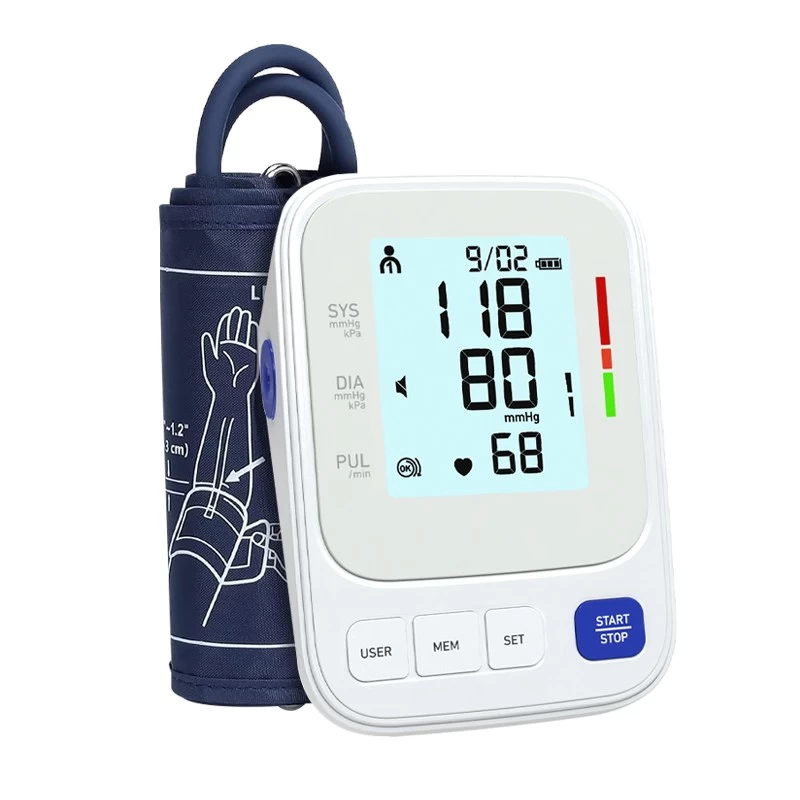
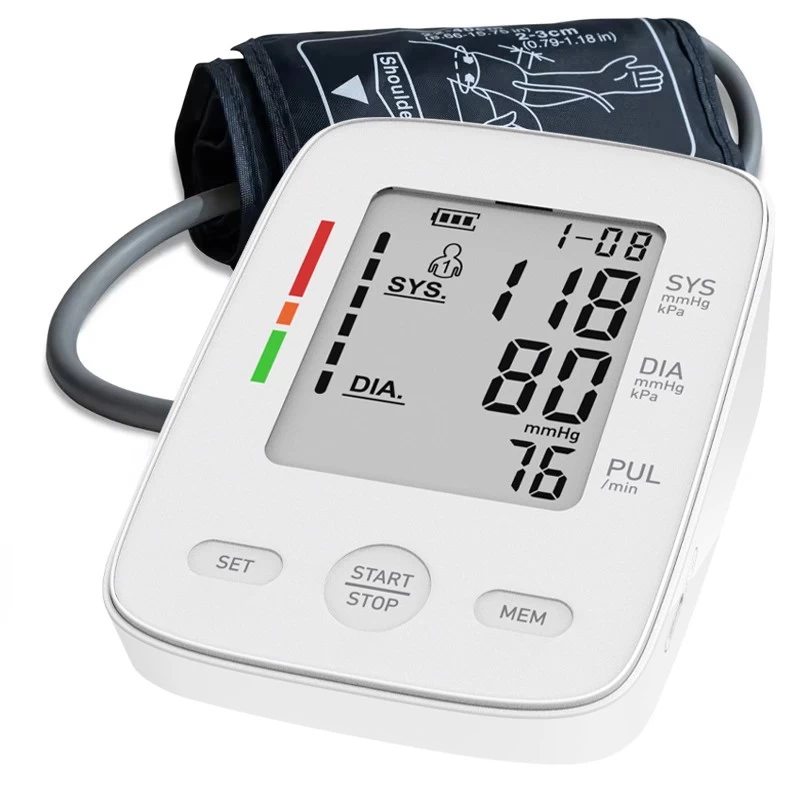
- Wait for the numbers to appear. Your systolic pressure (top number) and diastolic pressure (bottom number) will display on the screen, along with your pulse rate.
Step 3: Understand Your Results
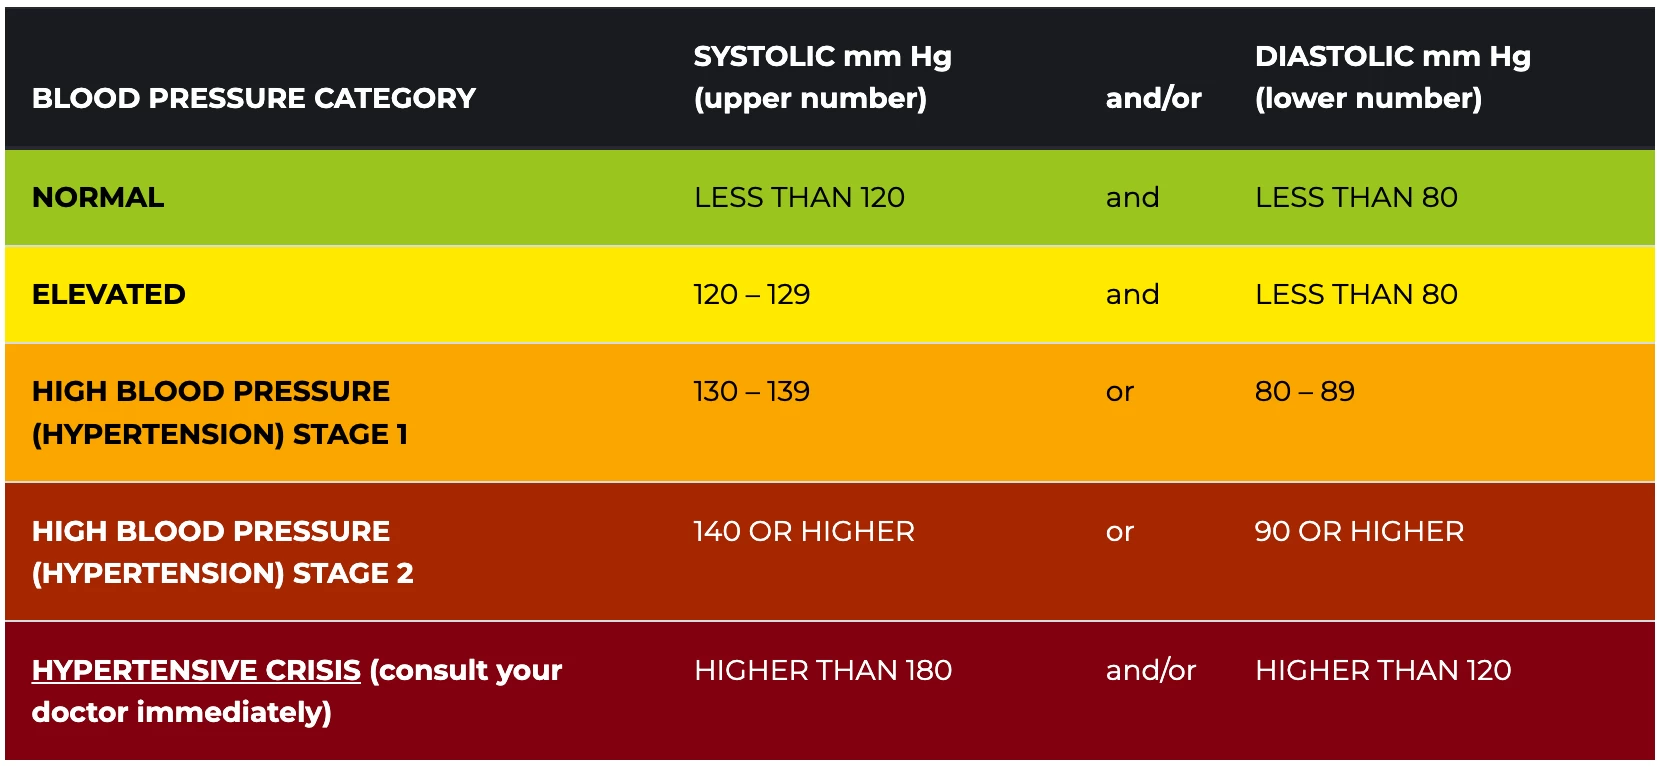
Blood pressure readings include two numbers:
1.Systolic pressure (top number): The pressure in your arteries when your heart beats.
2.Diastolic pressure (bottom number): The pressure when your heart rests between beats.
What’s normal?
1.Normal: Below 120/80 mmHg
2.Elevated: 120–129/<80 mmHg
3.High (Hypertension): 130/80 mmHg or higher
Note: Always consult your doctor to interpret results and diagnose conditions.
Common Problems (and How to Fix Them!)
1."My readings are all over the place!"
Solution: Take readings at the same time daily (e.g., morning and evening). Avoid caffeine, smoking, or exercise 30 minutes before measuring.
2."The cuff hurts my arm!"
Solution: Ensure the cuff isn’t too tight. You should fit one finger between the cuff and your arm.
3."The numbers don’t match my doctor’s readings."
Solution: Bring your monitor to your next appointment to compare it with the clinic’s device. Home monitors can sometimes differ slightly.
4."The monitor keeps giving an error message."
Solution: Reposition the cuff, check the batteries, or restart the device. Make sure the tube isn’t bent or blocked.
Pro Tips for Better Accuracy
1.Take multiple readings: Measure 2–3 times, waiting 1–2 minutes between each. Use the average for the most reliable result.
2.Keep a log: Record your readings in a notebook or app to share with your doctor.
3.Calibrate your monitor: Check its accuracy yearly at a healthcare provider’s office.
When to Call a Doctor
Contact your healthcare provider if:
1.Your readings are consistently 130/80 mmHg or higher.
2.You experience dizziness, chest pain, or shortness of breath alongside high readings.
3.Your monitor shows irregular heartbeats (many devices flag this with a symbol like)
Final Thoughts
Learning to use a blood pressure monitor is a small step that makes a big difference for your heart health. With practice, you’ll gain confidence and peace of mind. Remember: Consistency is key, and don’t hesitate to ask your doctor for help if you’re unsure about your results. Here’s to healthier days ahead!
Got more questions? Drop them in the comments below—we’re here to help!